Pixel & Oak POS docs
Add your menu
Open Menu. It has five tabs: Items, Categories, Choices, Tax and Import. Start with categories, then add your dishes, then the choices that go on them.
Categories
Menu → Categories → Add category: a name (Pizza, Burgers, Drinks), its order on the screen, a colour, and whether it shows on your website.
Dishes
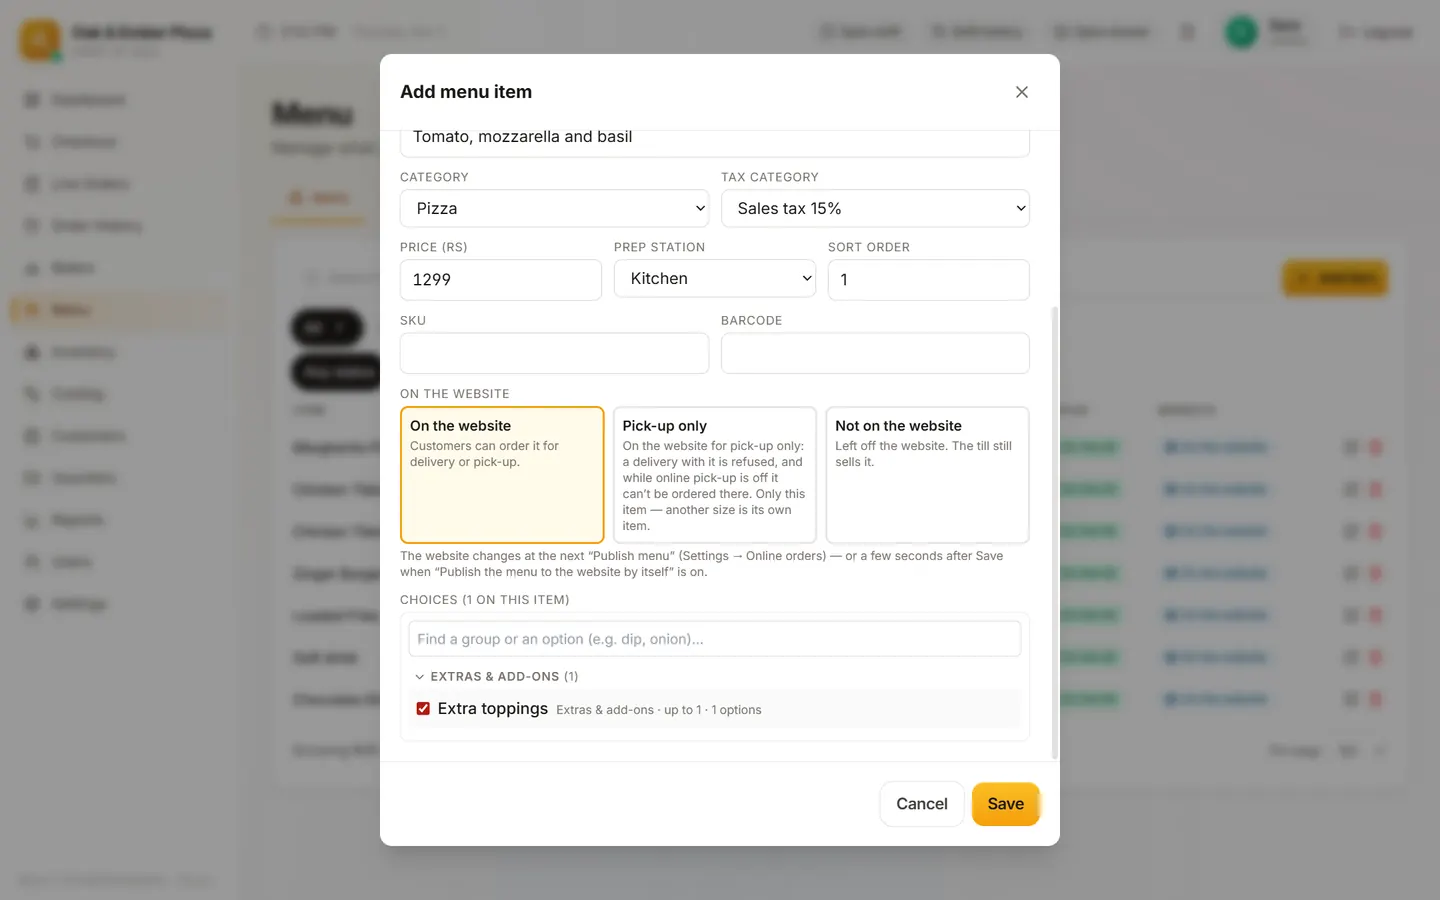
- Open Menu → Items and click Add item.
- Type the name and price, and pick the category and tax category. A description is optional.
- Pick the prep station (kitchen, bar or cold) so the ticket goes to the right place.
- Add a photo if you like (Tap to add a photo) and choose whether it shows on the website.
- Save. The dish appears on the checkout screen straight away.
Choices: add-ons, extras and leave-outs
What other tills call modifiers, Pixel & Oak POS calls Choices. Open Menu → Choices → Add group, name it (for example Extra toppings) and set How many can be picked: One only or Several, with an at-least and at-most. Then Add option for each one, with its price.
Then open the dish in Items and attach the group. The list shows groups as Must choose, Leave-outs and Extras & add-ons.
Pizza sizes
Sizes work for categories with pizza in their name. Add one item per size, named like Margherita — Medium and Margherita — Large. The checkout screen shows one Margherita tile and asks Choose a size to add to your order.
Tax
Menu → Tax → Add tax: a name and a rate. In Pakistan you can set a different rate by how the customer pays: card, EasyPaisa, JazzCash or bank (for example 15% cash and 8% card, as Sindh charges). Each dish uses one tax category.
Importing a menu file
Menu → Import → Choose menu file… loads a menu file (.json) in the till's own format, then Update the menu or Start fresh. We make that file for you from your printed menu: send us a photo of it on WhatsApp.
Stuck on a step?
Message us on WhatsApp with a photo of the screen. We can also join a video call and fix it with you.